Often, we want to perform a series of actions on a set of business records. Our CRM database contains emails and other data we might need to process regularly. Whatever these records are (Deals, Leads, or Loans), we can use Zapier to perform a series of steps on our database in Kintone. Let’s use Zapier to connect Kintone with Gmail to notify a list of customers once their “loan” has been completed.
Overview:
- Zapier and Kintone Overview
- Example of using Zapier with Kintone using Gmail
- Conclusion
Zapier and Kintone Overview
Zapier is an online automation tool that can integrate your data across separate platforms. Zaps are automated workflows created in Zapier, consisting of a series of steps, called actions. Zaps are started upon an event called a trigger. They can also be set to trigger on a timed schedule, such as daily or weekly. Follow Zapier’s overview to create your very first Zap.
Kintone is a no-code database app builder perfect for managing business data and team communication. Users can create interrelated apps from scratch quickly and easily without programming knowledge.
- Apps are used to store Kintone records.
- Records are displayed in lists, called Views.
Example of using Zapier with Kintone using Gmail
This article will use Webhooks to get Kintone records daily, and email our customers to tell them that their loan was closed.
- Let’s get filtered Kintone records from our “Loans app” with Zapier.
Unlike Make/Integromat, there is no “Get Kintone records” module. We have to use a Webhooks request to get them all. (There are limitations to this API, for example the limit is 500 records).
Let’s say we want to send emails to our “closed” loans every day. We will do a GET request to our subdomain and use a query to get only the “closed” loans that haven’t sent an email yet.
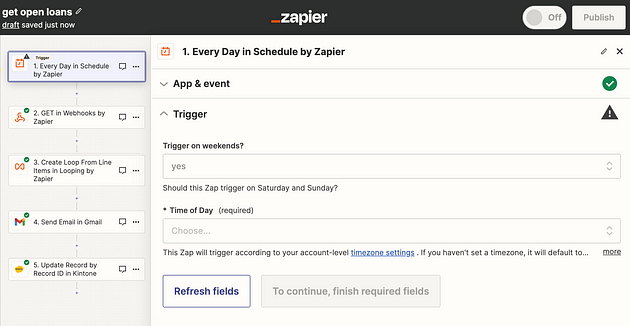
Create a step called “GET in Webhooks by Zapier”.
In the URL, we will put the query. The query will let us get Kintone records with fields set to a certain condition. The field codes in my case are called Loan Status and Email Sent. Use the bold “and” section if you want to filter by more than one Kintone field.
Format the URL like this:
https://{your-subdomain}.kintone.com/k/v1/records.json?app={your-app-id}&query={field_code}%20in%20(“{condition}”)%20and%20{field_code}%20in%20(“{condition}”)
In my case, “Closed” is an option of my Dropdown field called “Loan Status”. Loan Status has a field code called “loan_status”.
The query is saying, “give me the records where loan status equals Closed, which have email sent set to No”.
You can also use “and” in the query to narrow down records that have Email Sent dropdown set to “No”. That way, we only send emails to loan records that haven’t had an email sent to it yet.
- Here are more details on GET requests and queries with Kintone.
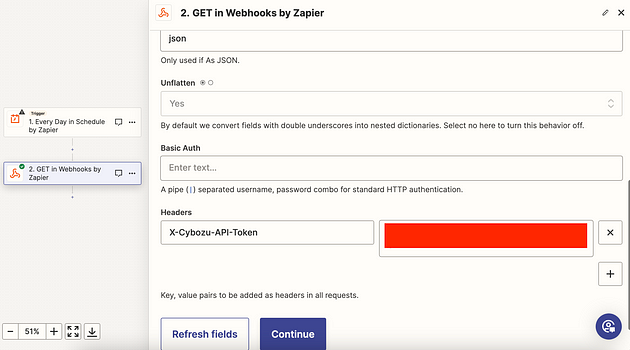
Lower down, input your API token with the header “X-Cybozu-API-Token”.
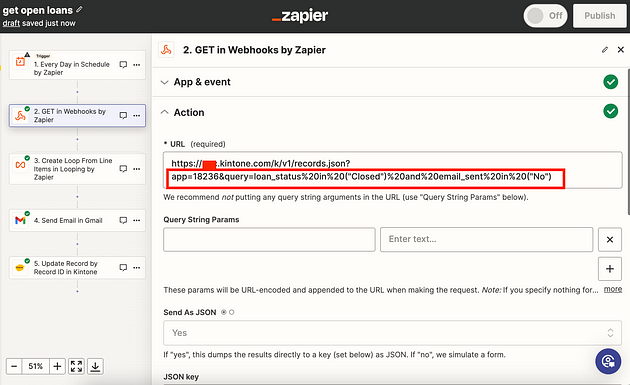
Replace the red square with your subdomain, replace the query with your app ID, field codes and conditions.
The API Key of the app is necessary to give us permission to get records.
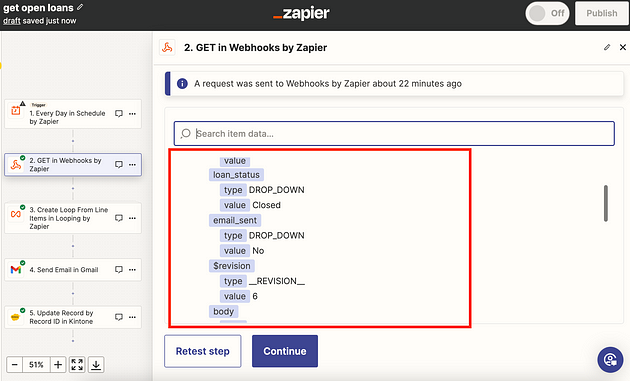
After you test this step, you should see a list of the records:
Now, we can actually Loop on this list of records.
Create a next step called “Create Loop From Line Items”. This will allow us to send an email to each record in the list.
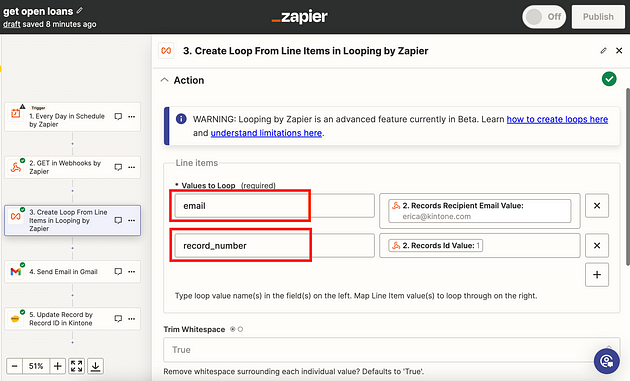
On the right, input the Records Recipient Email and the Records id Value. The left is where you put a variable name that can be used in the next steps.
For this case, do not change the Loop iteration counter start, and the Maximum loop iterations.
Next, create a step called “Send Email in Gmail”, or whichever email provider you prefer.
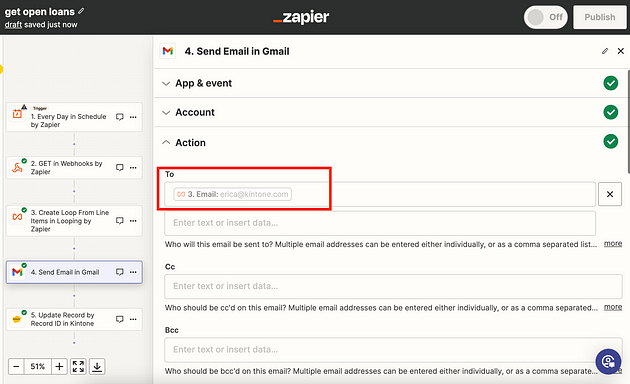
You can customize anything else about the email, such as the Subject and the Body.
The email fields can also be filled by data from the Kintone records, if you desire.
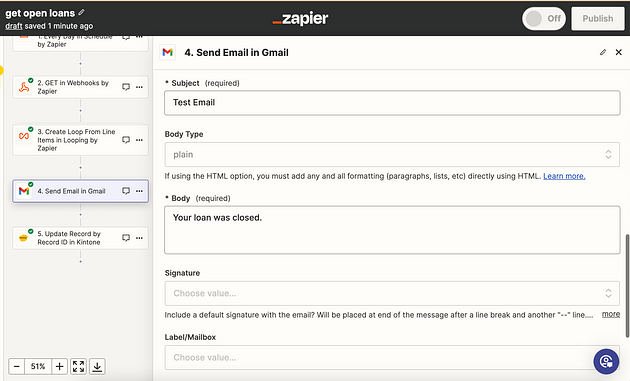
Fill out the body of the email and the subject.
Lastly, we need to update the Kintone records to say we sent the emails to the recipient.
Create a step called “Update Record by Record ID in Kintone”. Luckily, Zapier has this step natively, so we don’t need to use Webhooks to do this.
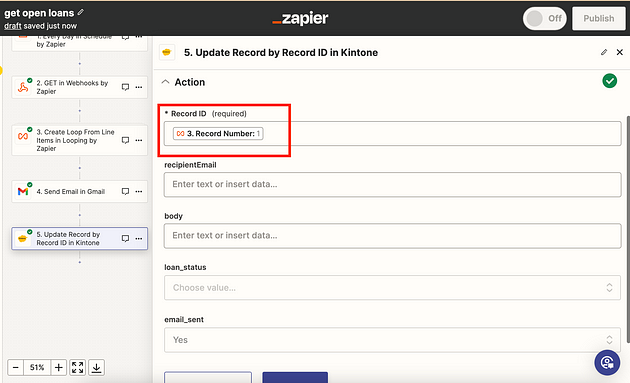
Put the record number from the Loop, and change “Email Sent” to “Yes”.
With the above settings, the Kintone record that we sent an email for will be updated with Email Sent to “Yes”.
This means that tomorrow, when the scenario runs again, this record will not appear in the GET request.
Conclusion
This explained the basics of getting a filtered list of Kintone records by query, and performing an action for each record by using Zapier. Business automation is a vast and evolving subject. Now that we have covered a more detailed use case, it’s easy to see how Zapier opens up a new world of possibilities. Keep up to date with articles to learn more about how automation with Kintone can improve your workflows.
Want to learn more?
If you're ready to try building using Kintone’s drag-and-drop builder to streamline your business operations, sign up for a free 30-day trial today, no strings attached.
About the Author


