Whether you realize it or not, most of the work tasks you do every day are part of a flow or process. The trouble with tracking these workflows is that they’re often invisible and involve steps that rely on memory, like remembering to forward the file to someone when you finish your monthly report.
And that’s the key benefit of using a workflow management tool like Kintone—it tracks every step of your workflow in one place so that you and your team always know the status and where to find the relevant info. Here’s a list of some of the other benefits you’ll get by building out your workflow on Kintone:
- Visibility for your whole team into current status and who things are assigned to ✅
- Clear structure so that everyone knows what steps are next ✅
- Centralization and accessibility so you can easily track multiple workflows across teams and departments in one shared workspace ✅
- Easy to find conversations organized by task, topic, or data point ✅
- Automated task handoffs and reminders so you spend less time managing the process ✅
- Everything is customized for exactly the way your team works and can be adjusted ✅
If you’re curious about what building out a workflow on Kintone looks like, you’re in the right place. We’ve laid out the steps for you below to help you get started.
Planning: Map out your workflow
Planning is a crucial but often overlooked step in the process—taking time to do this means you can make sure you’re capturing every step in your new workflow and get initial buy-in from the team.
Here’s how to do it.
- Get whoever’s involved in the process (including individual contributors and whoever’s managing the process) to write down every single step of the process (where they’re involved with it).
Even the smaller, “in-between” steps are important to take note of, like if Erica has to email the file to George or George needs to ping Erica to ask for the file. Kintone’s workflows actually reduce the need for communication over email or chat because you can tag other people or groups and comment directly in the workflow app. We’ll share a visual of what this looks like later on.
When you’re mapping out your workflow, check if multiple departments are involved. Make sure it’s clear who needs access to information or needs to be notified of edits at each stage as well. - Mark down who is responsible for each step of the workflow. Is it one assignee? Could it be one of multiple people who might be responsible aka whoever’s available out of a group of people? It’s important to account for conditional changes in your workflow. For example, what happens when a team member is out on PTO? Or perhaps you have someone on your team who only works certain days of the week.
- Next, check if there’s an approval stage needed in the workflow. Maybe you’ll need to leave room for a round or two of revisions and therefore will need an option to pass the task back to the person working on it before. Mark those steps down too. Kintone lets you build in branching conditional steps to accommodate different scenarios.
- Finally, plan for contingencies—a solid workflow also leaves room for the unexpected. For example, you might need an option to cancel a task or punt it for a later time.
Building: Setting up your workflow
Now here’s the fun part—the building!
- Start by setting up the basic bones of your app—use the drag-and-drop form to lay out all the information you’ll be collecting for this process. This will look different depending on what type of workflow you’re creating, but you should include all the basic info needed for the workflow, which might include the title of the task, draft and final deadlines, a link or attachment field for relevant files and webpages, and maybe a section for some additional notes.
Thanks to Kintone’s customizability, you can build a wide variety of workflow apps, from a content request & approval app to an expense report workflow, PTO requests, HR inquiries, and more.
Here’s an example of a content request workflow app with all the required information for each request already built out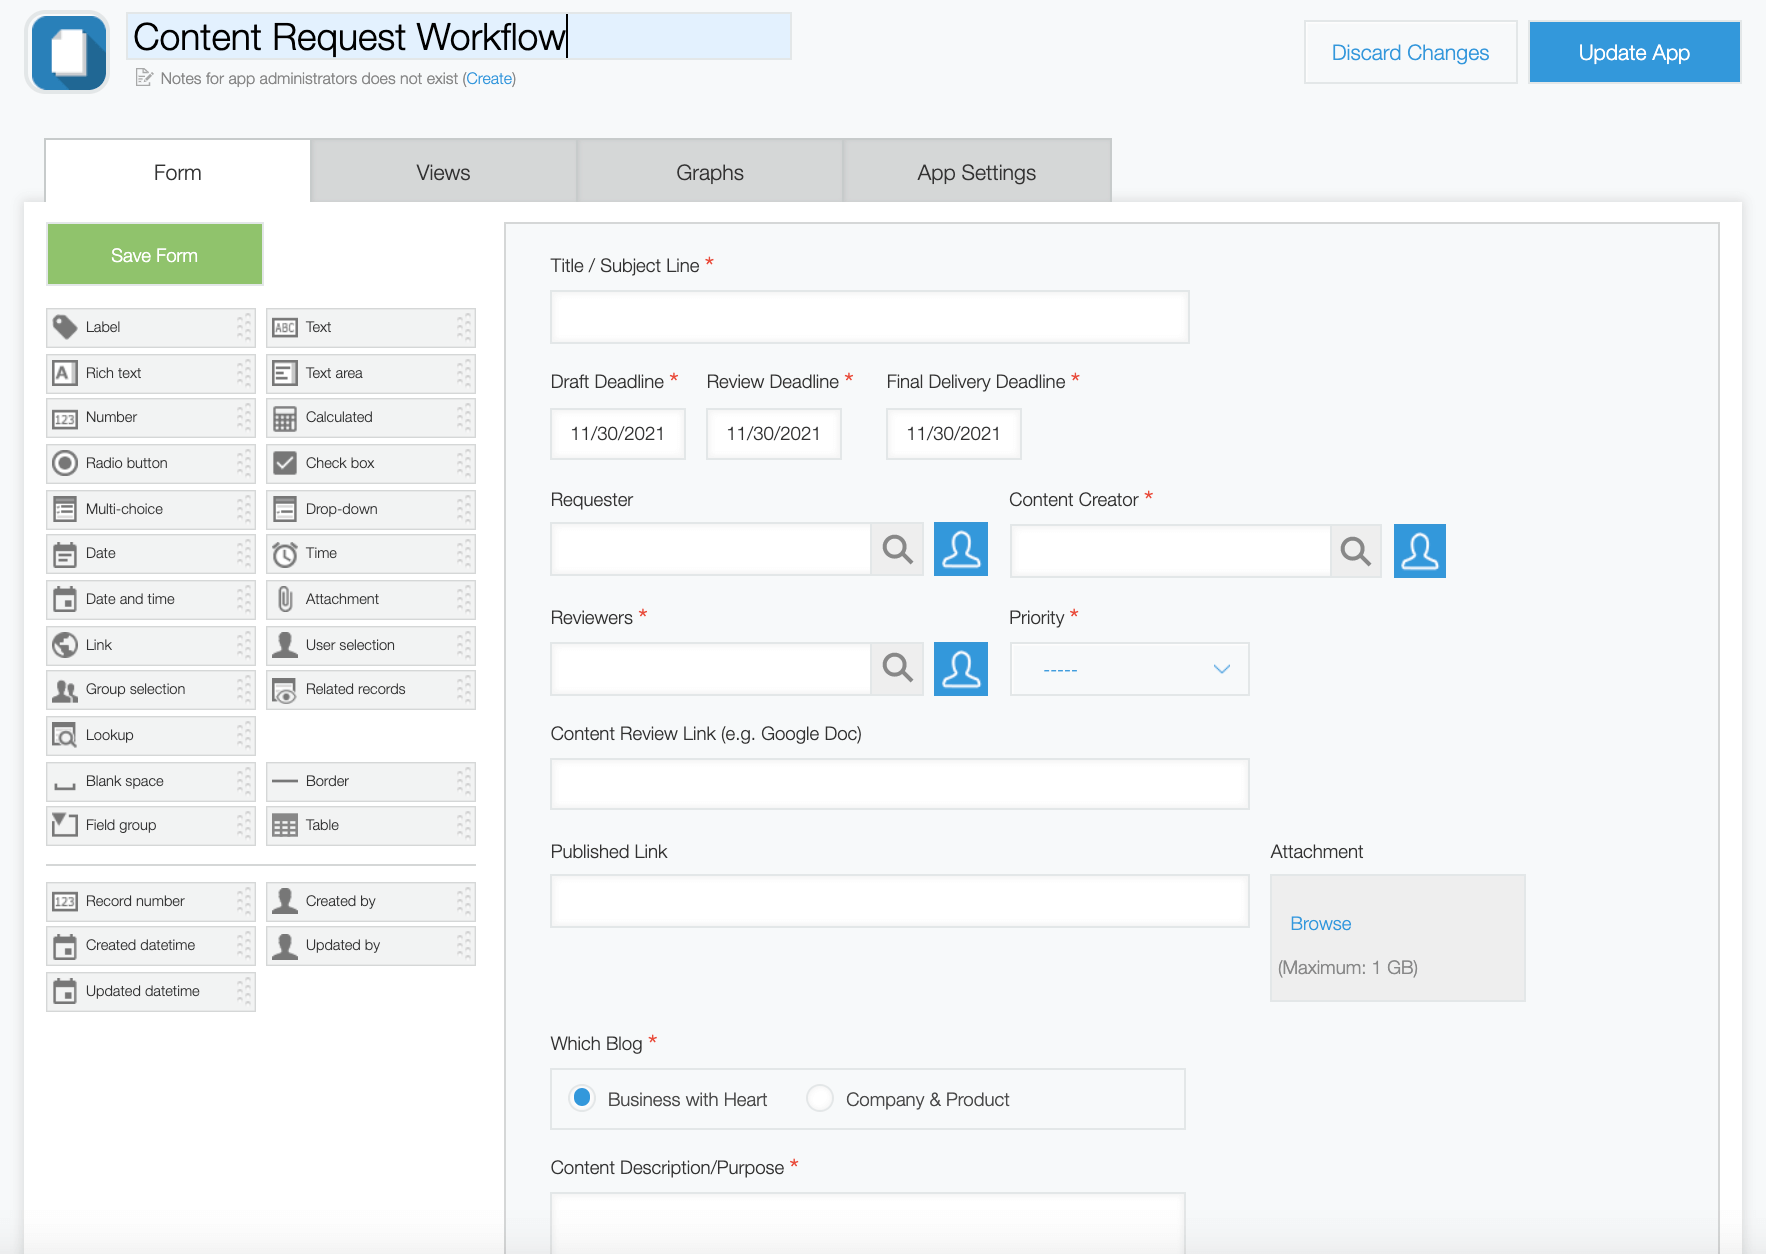
Related article: What can you build with Kintone - Once the basic app is built out, you can add in a workflow using Kintone’s process management features. You can designate a status and assignee (either a single user or group) for each step in your workflow. Make sure to refer back to your process map to capture each step accurately.
Start by laying out the statuses for each step.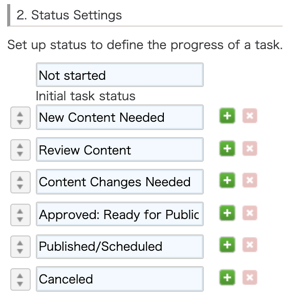
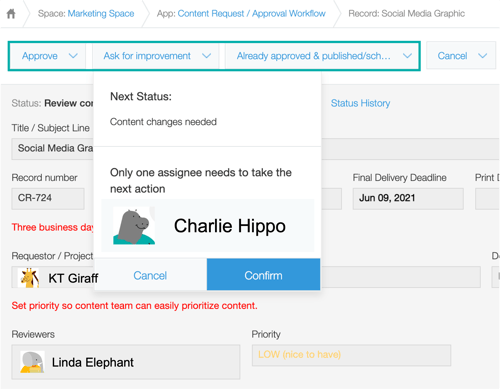
Then set up the button options to transition from the current step into the following one, including which assignee options should show up for that stage. Continue this until you’ve completed it for each step of the workflow.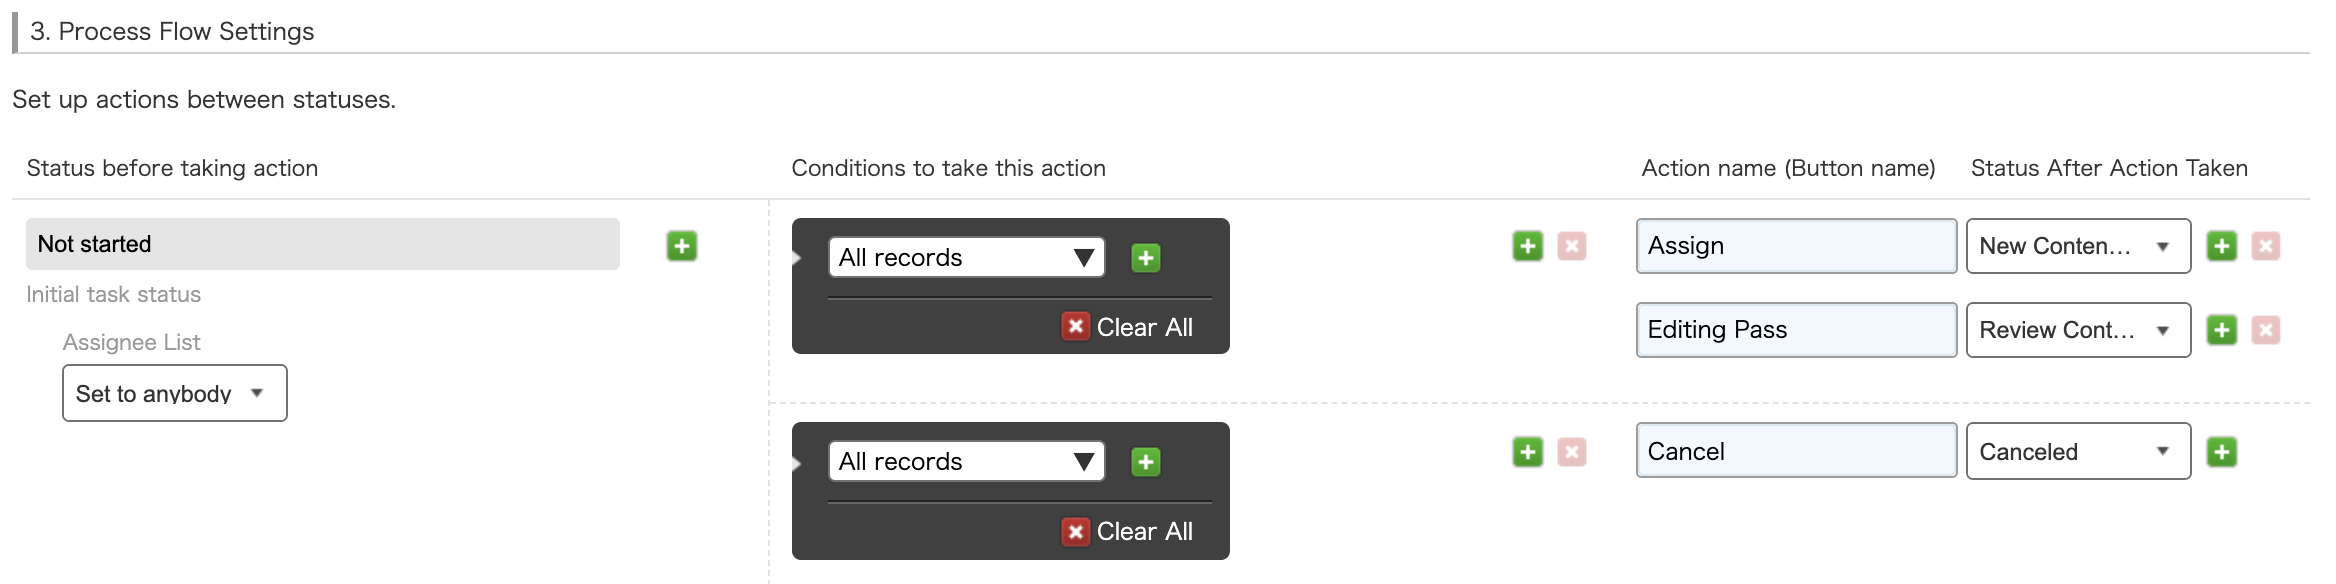
- Add the finishing touches. Kintone lets you set up a few different types of custom notifications and reminders for your workflow to eliminate the need for manual task handoffs or reminders. You can set up your workflow app so that certain individuals or groups get notified when a record is added/edited, when someone has a new task assigned to them, if there’s a deadline coming up, or even if something is overdue.
With Kintone, you can automate that “gentle nudge” for your team members—whether the reminder comes one day before the deadline or even a week before, that’s completely up to you!
Implementation: It’s time to use that workflow!
Let's see that workflow in action.
- Grab your team and test out your workflow with some dummy data to see if each step is working the way you want it to.
Take Kintone’s communication features for a spin—while the workflow management should eliminate the need to manually hand off tasks from one person to another, you might still need to ask question or add a note for future reference. You can do that right in the workflow app in the comment panel on the right. Just tag the appropriate team member or group and post your message.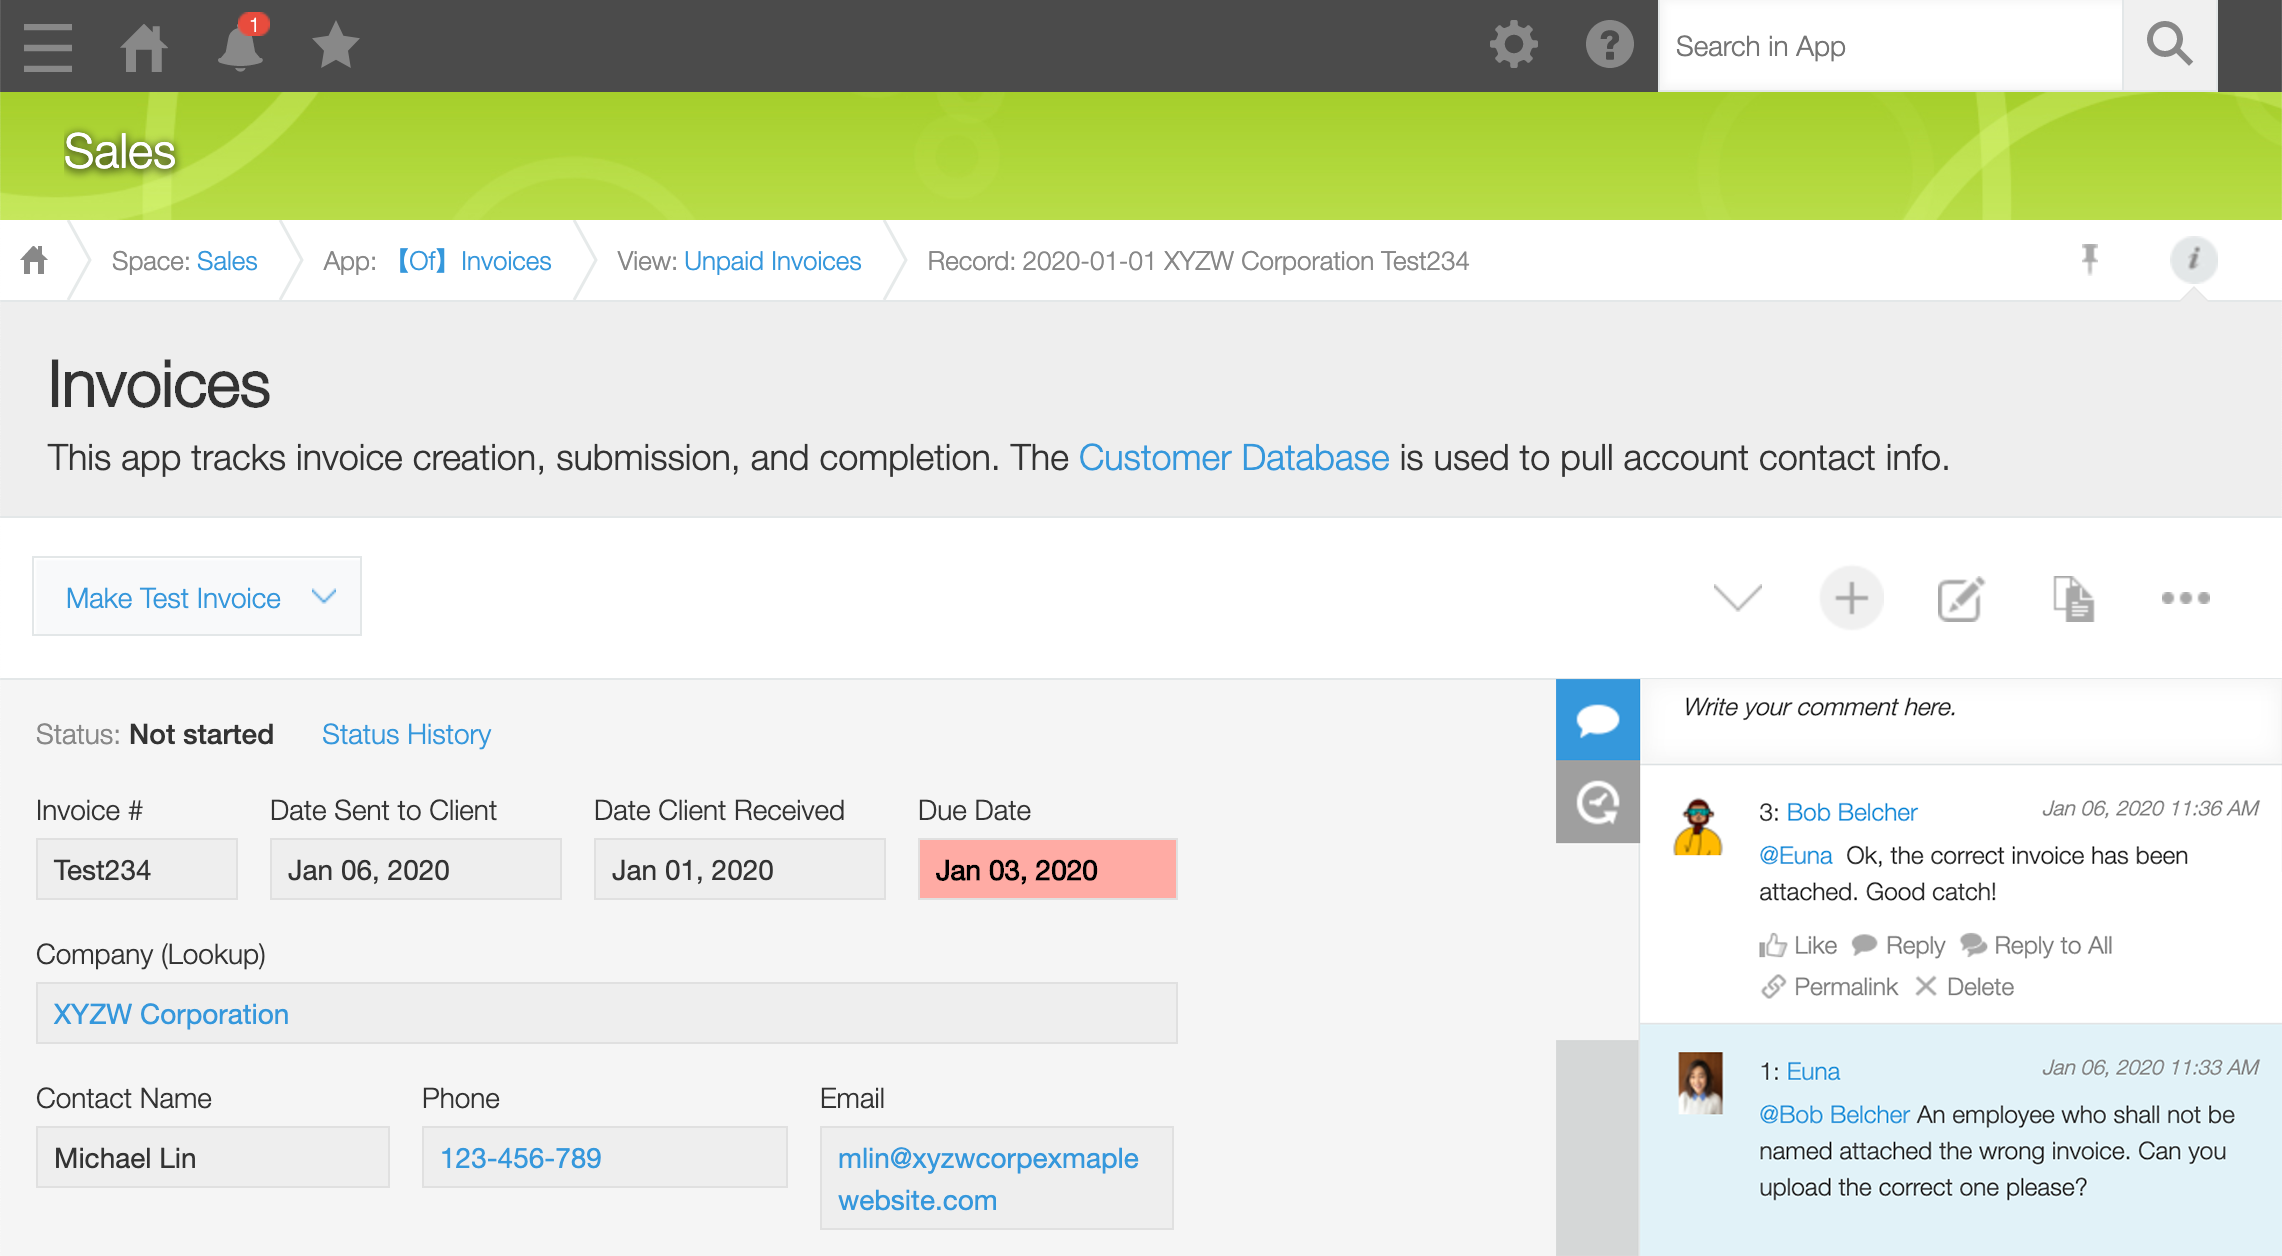
- If you run into anything that needs a tweak (maybe you realize there’s another data point that needs to be captured or that your deadline reminder needs to come a day earlier), you can do so with just a few clicks in the app settings.
- Start using your workflow and keep improving as you go—as your team’s processes change or as you come across ways to improve your workflows, you can easily make changes in the settings.
What to learn more about Kintone?
Now that you understand the basics about workflow management in Kintone, you can actually have one of our product specialists build you a prototype that’s customized for your team’s needs. Learn more here.
Or if you’re more of a hands-on learner, you can also sign up for our 30-day free trial (no credit card required) and dig into Kintone app building on your own. Sign up for your free trial here.


About the Author
Euna is a Senior Content Specialist at Kintone. She holds a BA in English from the University of Michigan and has a thing for words, food, and travel.